|
|
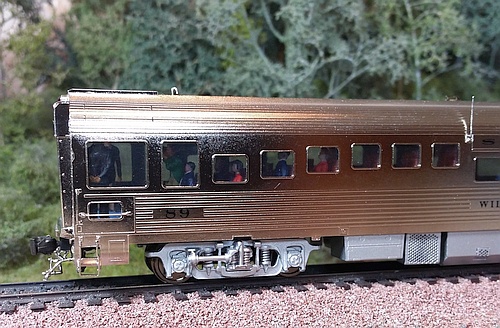


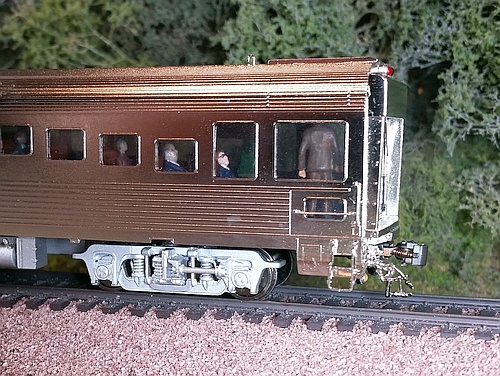


ATSF Business Car 89 William Barstow Strong
Santa Fe built this "track inspection" car to show off the railroad to potential customers and dignitaries.
In addition to special business trains, the "theatre car" was often tacked onto the end of hotshot
intermodal trains to showcase Santa Fe's efficient movement of priority freight across the system.
This brass model was made in Korea by Samhongsa and imported by Stewart Locomotive Works.
The entire car came nickel-plated simulating the stainless steel, so I airbrushed
the underframe and trucks a flat silver to better match the prototype.
Stewart made a cast resin theatre-style seating insert, but I instead built my own interior including
several seated passenger figures, a black-uniformed car attendant, a brown-suited Santa Fe
executive, and a rabid railfan photographer! For the tinted window "glass" on the car sides, I printed
a translucent gray onto clear acetate sheet, cut it out and glued it into the window openings. The
big rear window, which wasn't tinted on the prototype as far as I know, has a piece of clear styrene.
To get operational lights, I replaced the stock trucks with Walthers power-pickup passenger car trucks,
installed a basic DCC decoder, and added micro-LEDs in the light housings behind MV Lenses (no
longer available). More recently I added interior lights to better illuminate the interior seating and figures.
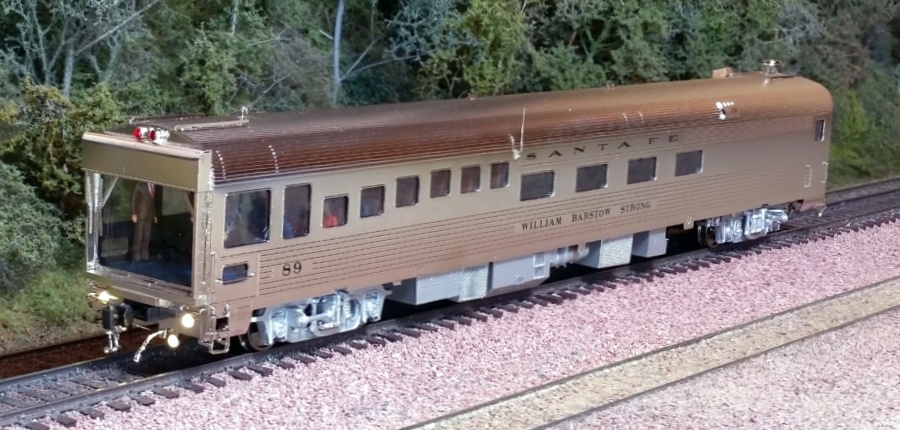
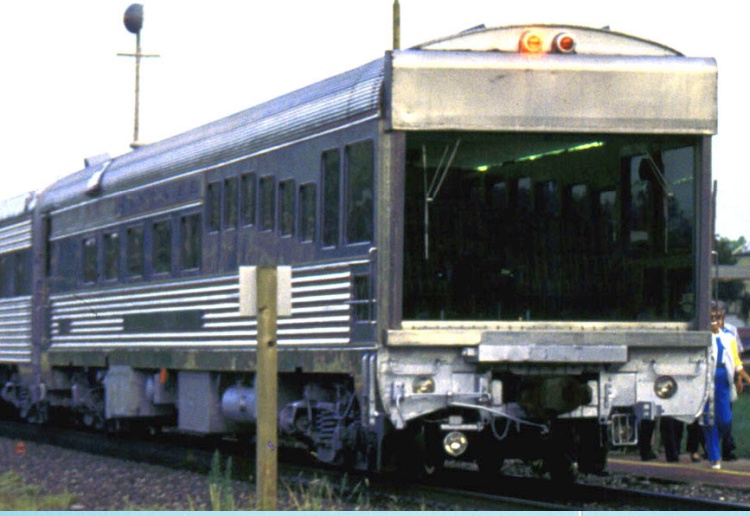
Right: The rear of car 89 with its
big picture window. The large blocky thing above the window
contains a roll-down cover used
to protect the window when the
car was not in use.
Here the four lower track lights are
not illuminated, and likely were
used only when running at night.
Note only the left-hand red safety
light is on - this seems to have
been the common practice, as
seen in numerous prototype
photos. I don't know how the
right-hand red light was used.
Also note the roof does not
appear to be painted white in
this photo.
-- About
-- Contact
-- Diesels
-- Links
entire website copyright Gregg Fuhriman
created with CoffeeCup Visual Site Designer
created with CoffeeCup Visual Site Designer
-- Layouts
-- Modules
-- Signalling
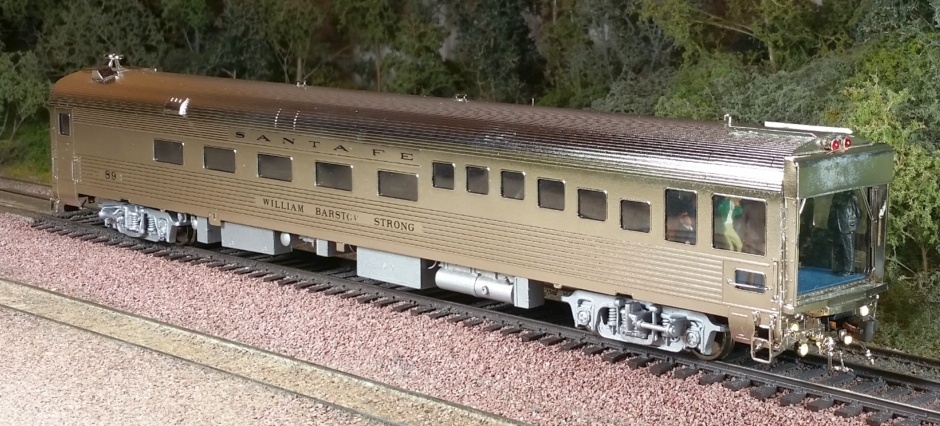
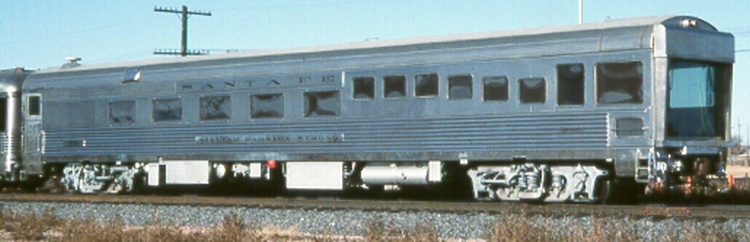
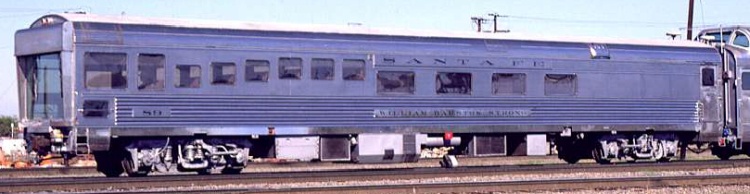
Right: side views of car 89.
Note here the roof appears to
be painted white, and the
under-rigging is painted silver
which contrasts with the stainless
steel car sides.
Big thanks to the photographers
for sharing these pics online!
Note here the roof appears to
be painted white, and the
under-rigging is painted silver
which contrasts with the stainless
steel car sides.
Big thanks to the photographers
for sharing these pics online!
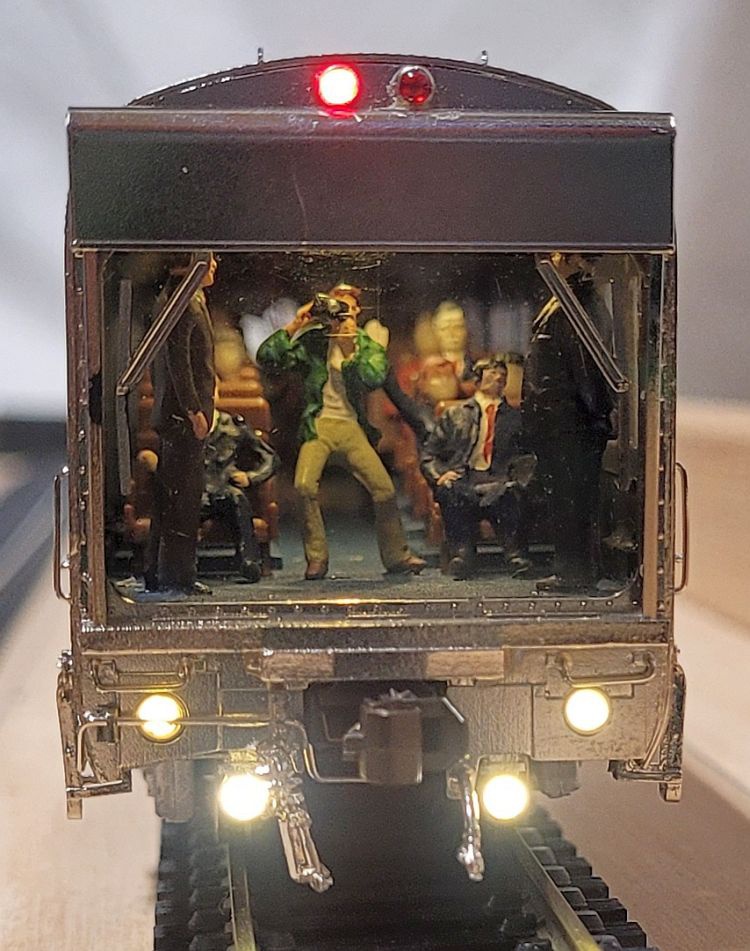
Right: Recently I replaced the
decoder to add more functions,
replaced the red LED to get a
brighter safety light, and added
white LEDs on the interior
ceiling to illuminate the figures.
decoder to add more functions,
replaced the red LED to get a
brighter safety light, and added
white LEDs on the interior
ceiling to illuminate the figures.
Right: I built up a partial interior
from a stack of styrene sheets to
make the theatre seating profile.
I added passenger car seats,
which have extended seat backs.
Various figures include seated
passengers, a car attendant, a
Santa Fe official (salesman?),
and a rabid railfan snapping a
shot out the big window.
from a stack of styrene sheets to
make the theatre seating profile.
I added passenger car seats,
which have extended seat backs.
Various figures include seated
passengers, a car attendant, a
Santa Fe official (salesman?),
and a rabid railfan snapping a
shot out the big window.
Right: A 2-pin connector is visible
here (upper left), carrying track
power up from the Walthers trucks.
This allows the underframe to be
disconnected from the carbody.
here (upper left), carrying track
power up from the Walthers trucks.
This allows the underframe to be
disconnected from the carbody.
Below: To better disguise the
track power wires, I used gray
wire to connect the Walthers
trucks together and then through
the floor to a 2-pin connector.
track power wires, I used gray
wire to connect the Walthers
trucks together and then through
the floor to a 2-pin connector.
Below: The Digitrax decoder is taped inside the roof, hidden toward the front of the car where there are few windows. A 3-watt, 120-ohm
load resistor is soldered between the motor leads, which is necessary to allow the DCC system to detect the decoder. Without this resistor,
the DCC system can't detect the decoder for CV reading/writing. a 3-pin connector attaches from the decoder function outputs to the white
interior light bar and the red safety light, with the wires routed and taped to the ceiling. The low-mounted white track lights have a separate
2-pin connector, shown loose here since it will be connected after the interior is installed.
Below: To allow installing the interior, I cut away a section of one floor mounting flange midway on the car. I then slid the interior "sideways"
through this cut-away, rotated it 90 degrees, and slid it along the floor mounting flanges into position. The interior is clear-taped to the flanges,
and the fine-gauge transformer wires for the four track lights are taped to the bottom of the interior. These wires route through a 2-pin connector
tied to the decoder function output. Finally, another 2-pin connector mates with the plug bringing track power up through the floor from the trucks.
All this allows the decoder and interior to be easily removed, if needed for repair, etc.