|
|
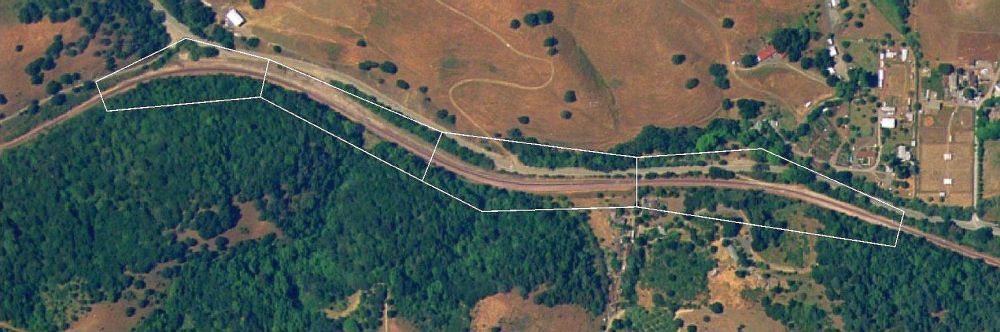


Below: Research and design began in 1997, before amazing things like Google Earth existed. To get the big picture,
this color aerial image was assembled from several smaller images found on the old Microsoft "terraserver" website.
To get a sense of the module's boundaries, I added white lines using a photo editing tool. The track curves on the
module were changed to 45-degree turns with 42" radii, the minimum allowed for mainline Free-mo track.
Glen Frazer Free-mo Module - Research & Design
Several resources and methods were used to learn about the real Glen Frazer
location and adapt it to an HO scale scene both useful for Free-mo layouts
and practical to store, transport, and set up at model train events.
Several resources and methods were used to learn about the real Glen Frazer
location and adapt it to an HO scale scene both useful for Free-mo layouts
and practical to store, transport, and set up at model train events.
Right: This Santa Fe track
chart circa December 1988
provides a plethora of useful
data including mileposts,
track curves, vertical
gradiants, signal locations,
bridge locations and types,
track materials, and
installation dates.
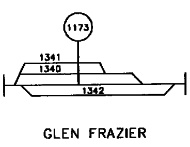
Below: This diagram from
a 1991 Santa Fe Railway
CLIC book shows the track
numbers and arrangement,
useful to switch crews.
Soon after this date, the
MofW tracks "1341" and
"1340" were disconnected
from the main at the west
end, turning them into a
spur. Note how the location
name is misspelled with
an extra "I".
chart circa December 1988
provides a plethora of useful
data including mileposts,
track curves, vertical
gradiants, signal locations,
bridge locations and types,
track materials, and
installation dates.
Below: This diagram from
a 1991 Santa Fe Railway
CLIC book shows the track
numbers and arrangement,
useful to switch crews.
Soon after this date, the
MofW tracks "1341" and
"1340" were disconnected
from the main at the west
end, turning them into a
spur. Note how the location
name is misspelled with
an extra "I".
But mostly I used my own photos, as I live just a few miles from Glen Frazer and was able to visit whenever I needed. Often, I'd
collect photos of one subject - for example, the hillsides covered with trees for modeling the scenery - but would discover hidden
gems in the photos, such as trackside details like the signs and utility poles. I attempted to replicate everything I saw in my photos,
right down to the white plastic edge markers lining Glen Frazer road, and the triple reflective yellow stripes at the base of every pole.
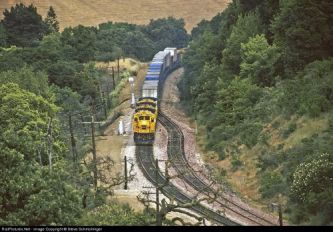
Below: This photo revealed a third signal at the east end, the odd
"dwarf on a post" at the right, and the lonely utility pole bringing
power to the signal equipment, both of which I'd not noticed on
previous visits. I added replicas of this signal and pole after the
module was mostly complete to enhance accuracy and interest.
"dwarf on a post" at the right, and the lonely utility pole bringing
power to the signal equipment, both of which I'd not noticed on
previous visits. I added replicas of this signal and pole after the
module was mostly complete to enhance accuracy and interest.
Above: the framework, placement of major electrical components,
hand-hold cutouts, etc.
Above right: the Masonite fascia profiles were arranged to fit on a
sheet of material.
Right: the fold-up legs and their supports, shown in red and blue, were
carefully designed around existing frame and electrical components.
Below: The transport rack was designed to fit in a full-size pickup.
Below: A handful of prototype photos were found on the web, such as these at the west
switch, derail, and east switch - thanks to the photographers for sharing your work!
switch, derail, and east switch - thanks to the photographers for sharing your work!
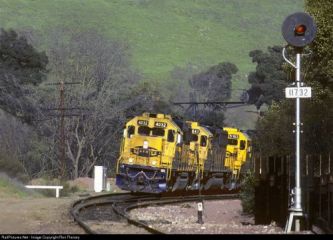
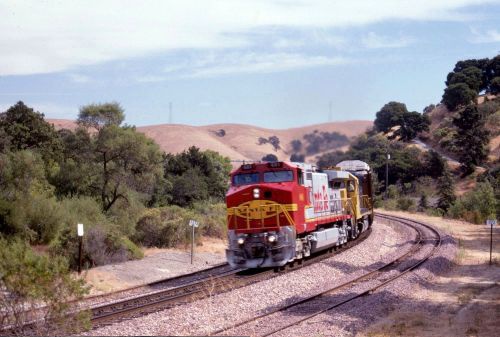
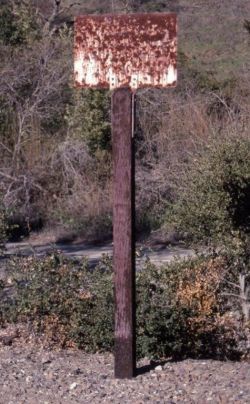
Below: Even "railfanning" shots came in handy. Here,
the trackside milepost markers "1173" midway through
Glen Frazer are visible, as is one of the "Keep Off" signs
on the left. During a follow-up visit, I took a detail shot of
the sign (bottom) to make a model of it from scratch.
the trackside milepost markers "1173" midway through
Glen Frazer are visible, as is one of the "Keep Off" signs
on the left. During a follow-up visit, I took a detail shot of
the sign (bottom) to make a model of it from scratch.
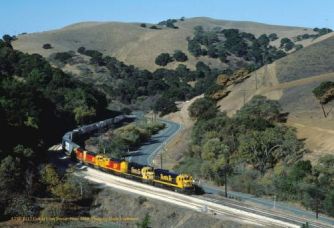
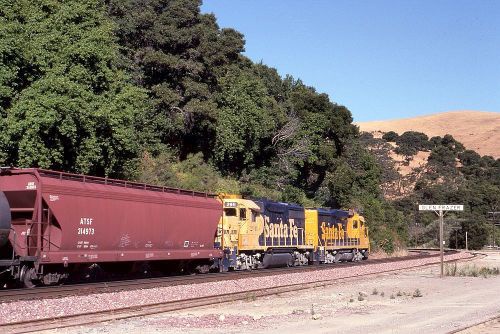
Below: Another railfanning shot of the "Pittsburg Turn"
waiting in the siding for clearance to deliver hoppers
to the carbon black plant at Collier a few miles to the
west. The station sign is clearly visible, and was
modeled accordingly.
waiting in the siding for clearance to deliver hoppers
to the carbon black plant at Collier a few miles to the
west. The station sign is clearly visible, and was
modeled accordingly.
I used Microsoft Visio to precisely design and draft most aspects of the module.
-- About
-- Contact
-- Diesels
-- Links
entire website copyright Gregg Fuhriman
created with CoffeeCup Visual Site Designer
created with CoffeeCup Visual Site Designer
-- Layouts
-- Modules
-- Signalling