|
|
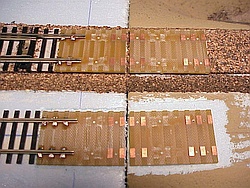

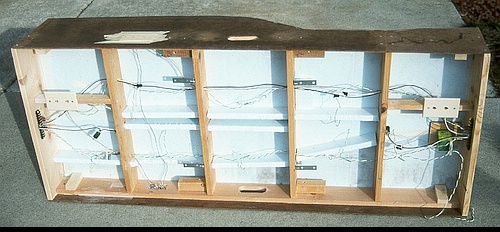
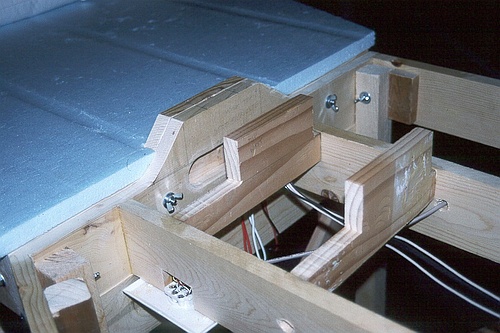


Below: To stiffen the frames, plywood gussets were glued and
screwed to the underside. The gussets have openings jigsawed
into the centers for access to wiring, etc. Also, holes were
drilled through all the frame members to allow wiring to pass
from "bay" to "bay". Here, the Free-mo Track Power bus,
Accessory Power Bus, and Digitrax LocoNet bus are visible.
screwed to the underside. The gussets have openings jigsawed
into the centers for access to wiring, etc. Also, holes were
drilled through all the frame members to allow wiring to pass
from "bay" to "bay". Here, the Free-mo Track Power bus,
Accessory Power Bus, and Digitrax LocoNet bus are visible.
Glen Frazer Free-mo Module - Construction and Scenery
Glen Frazer is one of the earliest Free-mo modules constructed in the US, way back in 1997 when the
Northern California Free-mo (NorCalF) group was formed. Time has shown the structural materials and
methods used are not the best for portable modules that must withstand the wear and tear of transport,
setup, and tear-down over many years of use in modular layouts. Rather, this page documents how these
modules were built, including notes describing why these methods and materials were chosen, and
suggestions for better solutions learned over the 20+ year history of NorCalF and other US Free-mo groups.
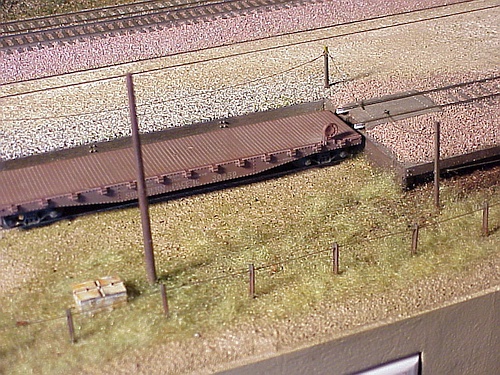
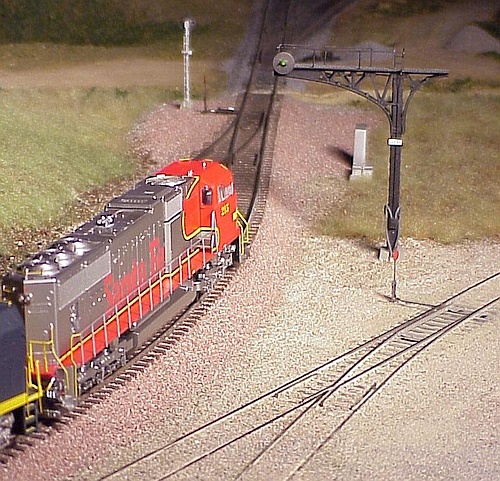
The Ramp section with track and scenic contours complete.
Layers of 3/4" foam board were stacked and glued wedding-cake
style, then carved to shape using Stanley brand Sure-Form tools.
Layers of 3/4" foam board were stacked and glued wedding-cake
style, then carved to shape using Stanley brand Sure-Form tools.
Below: Later, PCB tie plates were installed using latex Liquid
Nails glue, and rails soldered to their small copper patches for
strength. To eliminate the tedious task of installing fitter rails
at internal section joints, the rails were extended all the way to
the internal endplates (note: the Free-mo ends still have rails
set back 1 inch as required by the standard).
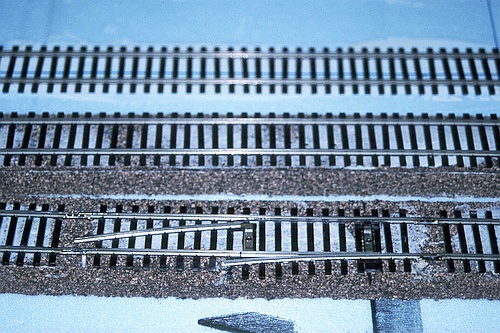
A better method at internal section joints is to extend rails to
the internal endplates, but allow the rail ends to flex a bit to
accommodate small misalignments and use a "floating" joiner
to hold the rail ends in alignment.
Nails glue, and rails soldered to their small copper patches for
strength. To eliminate the tedious task of installing fitter rails
at internal section joints, the rails were extended all the way to
the internal endplates (note: the Free-mo ends still have rails
set back 1 inch as required by the standard).
A better method at internal section joints is to extend rails to
the internal endplates, but allow the rail ends to flex a bit to
accommodate small misalignments and use a "floating" joiner
to hold the rail ends in alignment.
Below: The roads were made by cutting apart asphalt roofing shingles,
applied "rock side down" so the black asphalt underside represents
the road surface. The lane was installed, along with surrounding dirt
and some details, before the bridge was constructed above it.
applied "rock side down" so the black asphalt underside represents
the road surface. The lane was installed, along with surrounding dirt
and some details, before the bridge was constructed above it.
Once the track was in place and spray painted with brown latex paint (water-based to avoid damaging the foam),
the scenery was installed in layers. The first layer was dirt and track ballast as illustrated here on the Ramp section.
the scenery was installed in layers. The first layer was dirt and track ballast as illustrated here on the Ramp section.
Below and below right: To install, the fuzz grass is mashed down
into white glue spread on the dirt/plaster surface and, once cured,
"fluffed" back up using a bottle brush. This also removes most of
the loose material, which can be re-used for further installs.
In some areas, Woodland Scenics "flowers" in yellow (mustard weed)
and orange (California poppies) were sprinkled onto the grass, fixed
in place using cheap hairspray.
Note how trackside details such as cribbings, fences, signs, poles,
battery and signal boxes, etc. were installed in parallel with the scenery.
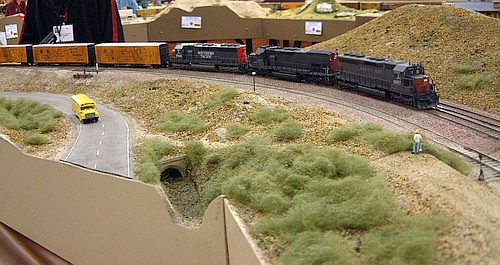
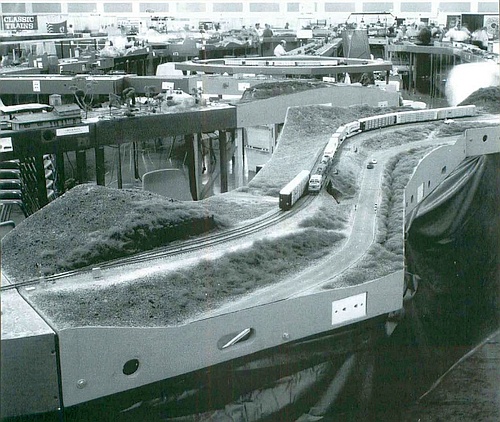
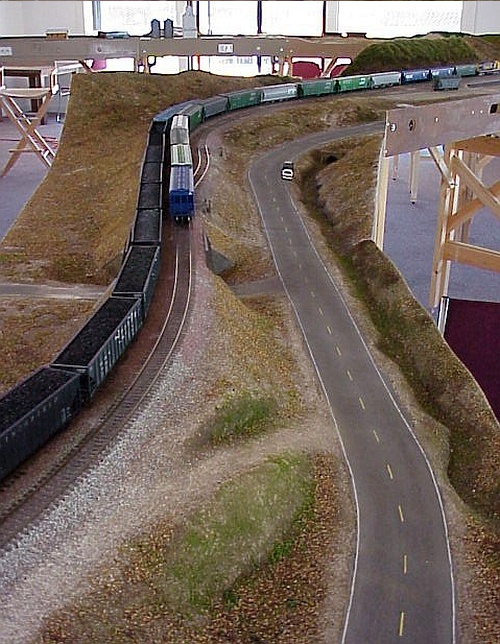
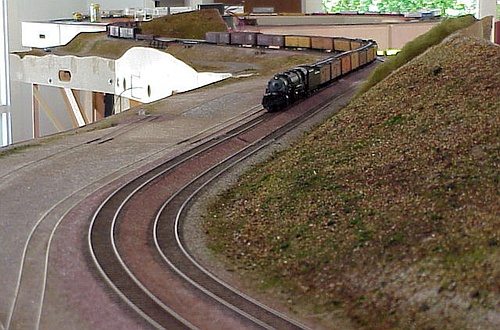
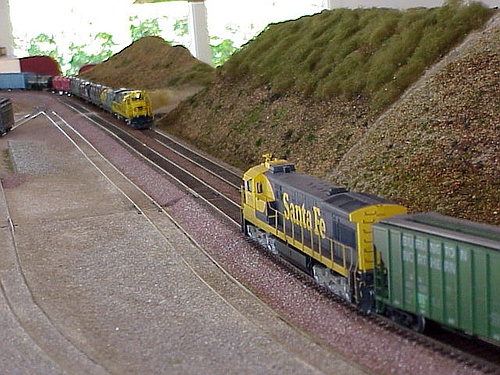
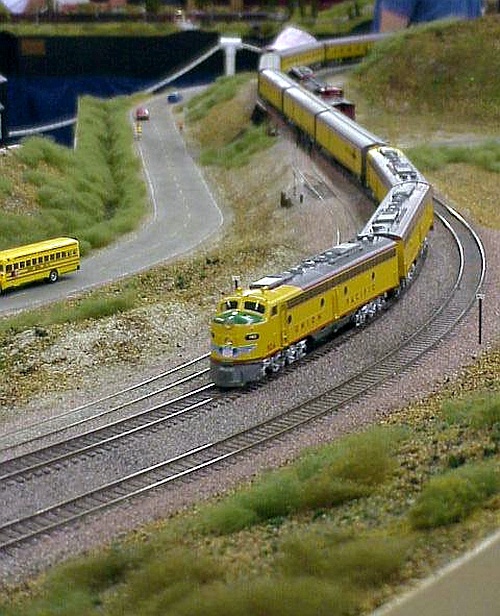
Below: This was the state of Glen Frazer in 1999 and early 2000 when Northern California Free-mo held two test setups to verify our new
modules worked together as a layout, in preparation for our big debut at the 2000 National Train Show in San Jose, CA in coordination
with the San Luis Obispo Model Railroad Club, who were also converting their NMRA-style modules to Free-mo at the time.
The second layer of scenery consists of "grass" and "fallen leaves". The leaves are a mix of natural "stuff" that comes off the trees in my
neighborhood in the spring. I swept it up from the driveway and gutter, screened out the bigger junk, and fixed it in place with a 50:50 mix
of white glue and water. This material was placed where dense stands of bushes and trees will be added later.
Some areas also had the beginnings of the third layer of scenery, "bushes and undergrowth", also concentrated where heavily-forested
areas were to be added later. These large bushes, which I call "puff bushes", are made by forming black polyfiber (found at a craft store
during Halloween season) into flat mats and spray-painting them either beige or gray. Once dry, these mats are torn into chunks, pulled
into three-dimensional bush shapes, sprayed with hairspray, and sprinkled with various colors of Scenic Express flock.
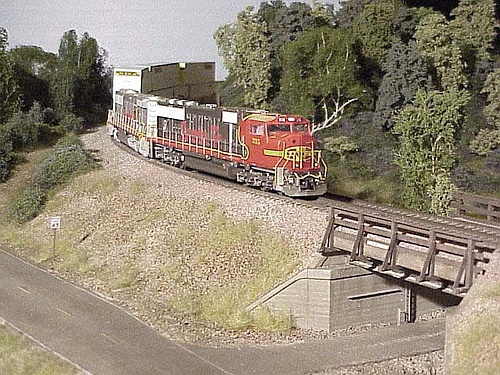
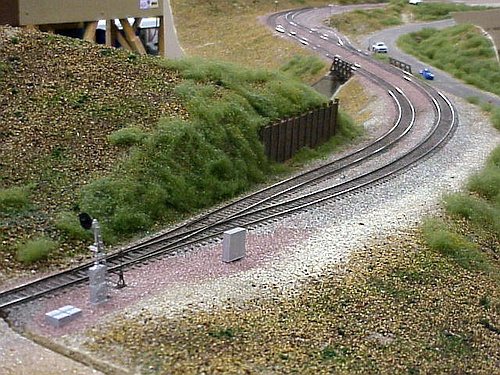
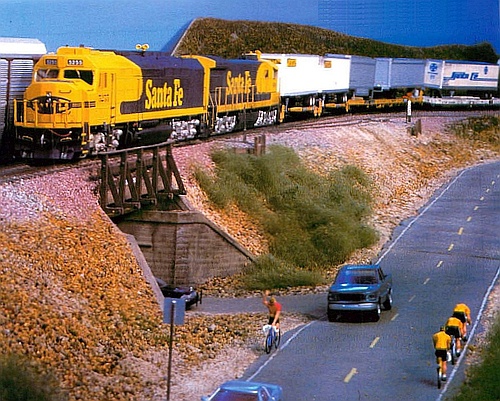
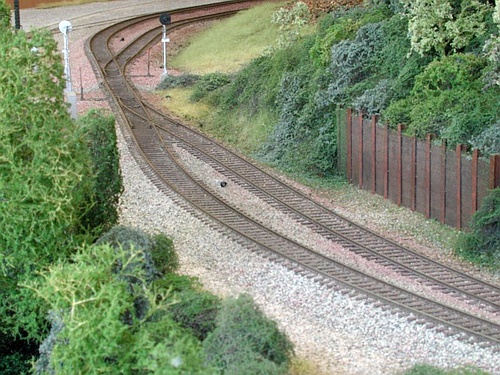
Right: A good view of the creek bed paralleling Franklin Canyon Road
on the East Switch and Derail sections. Later, a mish-mash of debris
(branches, rocks, etc.) were installed into the creek and clear epoxy
"water" poured around it. The real creek at Glen Frazer runs only during
rainy weather in winter and spring (the season modeled); otherwise it is
usually dry. To the right of the vehicles, the dark brown Masonite fascia
material is visible, before painting Glidden brand "Great Desert" beige
to match the dirt color.
Below: Larger puff bushes were cut using scissors to make smaller
bushes, capturing the random variation found in nature.
To get Glen Frazer safely to and from Free-mo events, I built
a custom-designed transport rack that fits in a pickup or van.
a custom-designed transport rack that fits in a pickup or van.
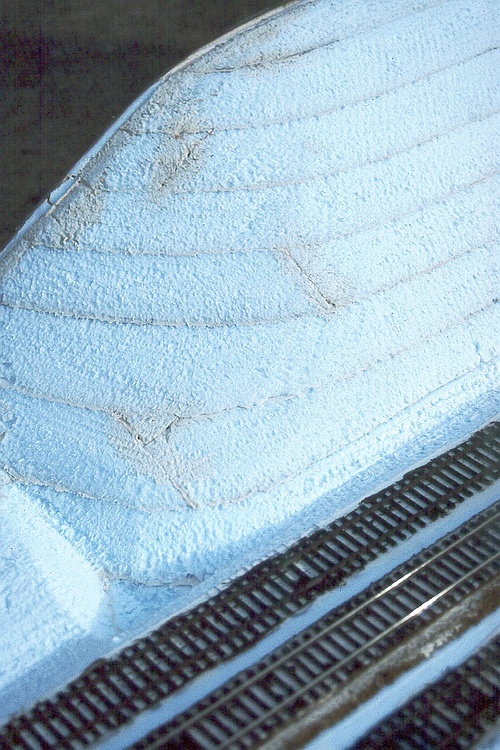
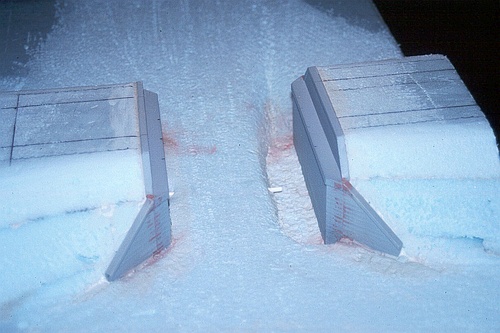
Below: This is the East Switch frame. Note how the endplates
extend above the frame surface to accommodate the scenic
profile that will drop below track level. The left-hand endplate
was later shaped to match the scenic profile where the track
is on a fill. The right-hand end is the Free-mo endplate.
extend above the frame surface to accommodate the scenic
profile that will drop below track level. The left-hand endplate
was later shaped to match the scenic profile where the track
is on a fill. The right-hand end is the Free-mo endplate.
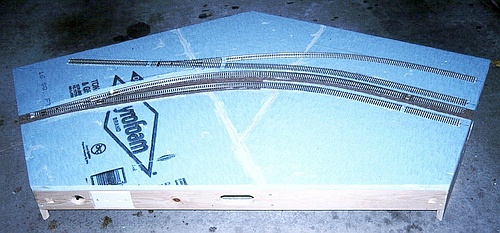
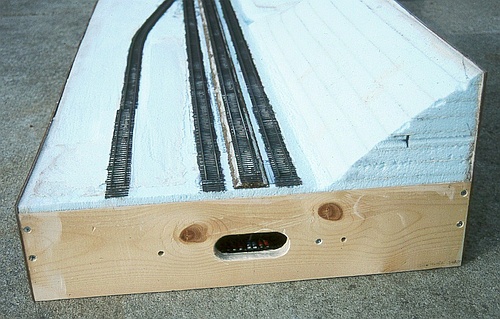
Below: This is the West Switch section, ready for scenery contours. To reduce the weight of the module, foam board (intended for
home insulation) was pieced together and glued to the frames using latex Liquid Nails, a water-based slow-curing adhesive.
ATTENTION: This method is *not* recommended ! Instead, use 3/4" baltic birch plywood for the track sub-roadbed, as it's much
flatter and more stable over time. Trust me - you do not want your module's track profile changing after a few years! Foam board
is fine for scenic contours, but needs to be very firmly glued to wood frames and track sub-roadbed. I suggest Gorilla Glue.
On Glen Frazer, the Liquid Nails glue became brittle and cracked over time, and the foam expanded/contracted differently than
the underlying pine frames. After several years, this caused serious track profile problems - see the restoration process here.
Once track centerlines were marked, Walthers/Shinohara code 83 track was installed. The side tracks were glued directly to the
foam tops, while the main track was glued to cork roadbed to elevate it above the side tracks. Latex Liquid Nails was used and
for this application it seems to have held up well over time.
Left: The original legs bolted
on. Later, fold-up legs were
installed to simplify transport,
setup, and storage (though
they added weight).
on. Later, fold-up legs were
installed to simplify transport,
setup, and storage (though
they added weight).
Below: The derail with the dirt/ballast scenic layer
in place circa mid-2000. The cribbing around the
switch stand is scratch-built from strip-wood.
in place circa mid-2000. The cribbing around the
switch stand is scratch-built from strip-wood.
Detail of the loading ramp.
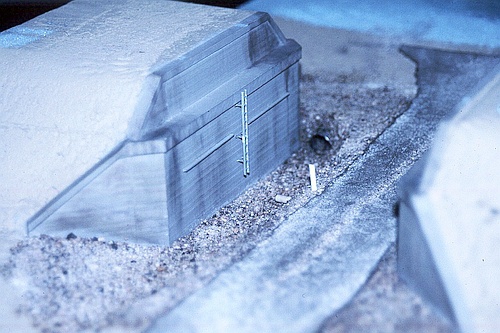
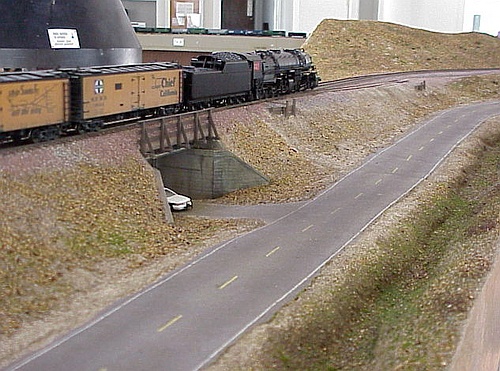
Below: The bridge on the East Switch section is supported by wood blocks attached
to the frame. The Walthers abutments were modified to fit, then glued to the wood
blocks. Foam was layered in around the abutments and contoured to shape.
to the frame. The Walthers abutments were modified to fit, then glued to the wood
blocks. Foam was layered in around the abutments and contoured to shape.
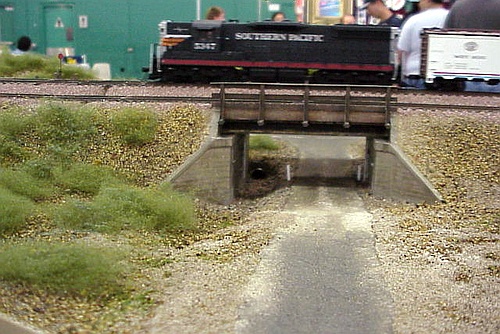
Below: The completed bridge. Styrene beams and strip-wood
cross members form the base of the bridge, followed by a
solid wooden floor onto which cork, track, and ballast were
laid. Safety railings are strip-wood and NBW castings.
cross members form the base of the bridge, followed by a
solid wooden floor onto which cork, track, and ballast were
laid. Safety railings are strip-wood and NBW castings.
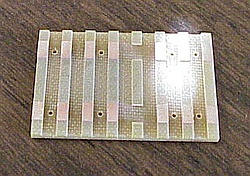
Left: Circuitron Tortoise
turnout motors are used
throughout Glen Frazer.
Wooden blocks are glued
to the foam underside,
to which the Tortoises
are screwed.
The slide-on connectors
are a Molex product.
turnout motors are used
throughout Glen Frazer.
Wooden blocks are glued
to the foam underside,
to which the Tortoises
are screwed.
The slide-on connectors
are a Molex product.
Below: The dirt/plaster mixture was spread thinly over the foam
contours using a stippling action with a small paint brush. Once
sprayed with "wetted" water (a drop or two of dish soap added
to break the surface tension), the dirt/plaster hardened into a
sturdy shell. A soaking of white glue diluted 50:50 with water
locked down the dirt firmly to the foam. The finished effect is
dry ground on a bright, sunny day that helps make the scene
feel like it's outdoors, even under interior lighting.
The scenery was completed with hundreds of hand-made trees. A few trees are natural twigs with polyfiber and ground
foam leaves attached. But the vast majority were made in large batches from Scenic Express SuperTrees armatures.
These were cleaned of the weird curly-cue leaves they come with, then spray-painted various "bark" colors of brown,
beige, and gray. After spraying with cheap hairspray, assorted colors of flock foam were sprinkled on followed by a
final spritz of hairspray. I prefer the Scenic Express flock as the size seems to best capture HO scale leaves, to my eye.
The trees were installed by poking a hole down into the foam, placing a drop or two of white glue on the hole, and sticking
the tree trunk in. I worked from one end of the module set to the other, randomly mixing trees of various sizes, shapes, and
colors. Small twigs that broke off in the process were used to model smaller trees and low-growing bushes to add variety.
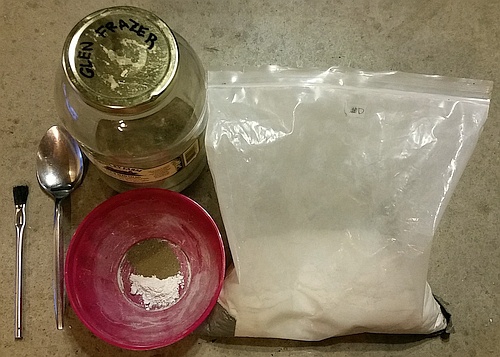
Below: Real dirt was collected from the actual Glen Frazer
site to ensure the correct color, and sifted to a fine powder
that was mixed 50:50 with dental plaster to lighten the shade.
site to ensure the correct color, and sifted to a fine powder
that was mixed 50:50 with dental plaster to lighten the shade.
Below: Main track ballast is Arizona Rock & Minerals (AR&M) brand
Santa Fe "mauve" - both HO and N scale grades were used.
The siding has some AR&M salt-and-pepper ballast representing a
material Santa Fe used prior to their iconic pink ballast. The contrast
adds interest and "history" to the scene.
Santa Fe "mauve" - both HO and N scale grades were used.
The siding has some AR&M salt-and-pepper ballast representing a
material Santa Fe used prior to their iconic pink ballast. The contrast
adds interest and "history" to the scene.
Below: Moving parts of turnouts were covered with paper towels
and tape, then carefully scenicked later as a second step. Once
ballast was complete, I weathered the track with an airbrush,
darkening the center with a thinned brownish black grime color.
and tape, then carefully scenicked later as a second step. Once
ballast was complete, I weathered the track with an airbrush,
darkening the center with a thinned brownish black grime color.
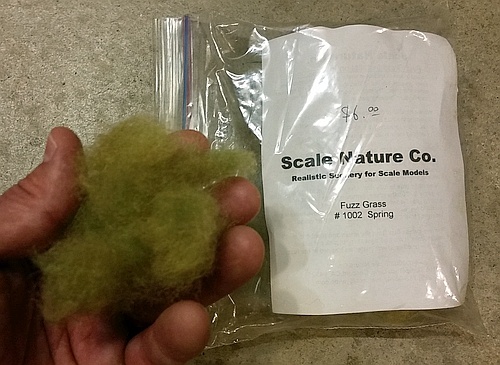
Below: I invented what I call "fuzz grass" to represent
California's late Spring grass that takes on a "fuzzy" look
as it goes to seed and shifts from green to golden yellow.
I make my fuzz grass from latch-hook yarn - various
greens, yellows, browns, and grays are cut to short
lengths and "fuzzed" in an old blender.
California's late Spring grass that takes on a "fuzzy" look
as it goes to seed and shifts from green to golden yellow.
I make my fuzz grass from latch-hook yarn - various
greens, yellows, browns, and grays are cut to short
lengths and "fuzzed" in an old blender.
Right: The East Switch retaining wall is made from styrene H beams
and strip-wood chunks, painted and weathered to match the prototype.
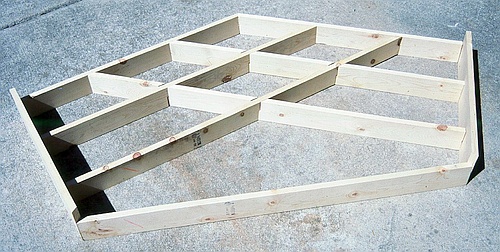
All frames are made from pine lumber that I salvaged from a dismantled home layout, then glued and
screwed together. The problem with pine is that it's rarely straight and square, leading to errors in the overall
size, shape, and flatness of the finished frame. Pine can also warp and twist over time as it dries and ages.
A better choice is 3/4" Baltic Birch plywood, the kind with many plys. This material is expensive and heavy,
but it's very stable over time and can be cut and shaped very precisely with good quality saws and tools.
Framing precision, sturdiness, and stability are crucial for modules, as they must survive handling, transport
and setup, and also endure humidity and temperature changes. The endplates must be very flat and square
to the frame both vertically and horizontally to ensure proper mating to adjacent modules in a layout.
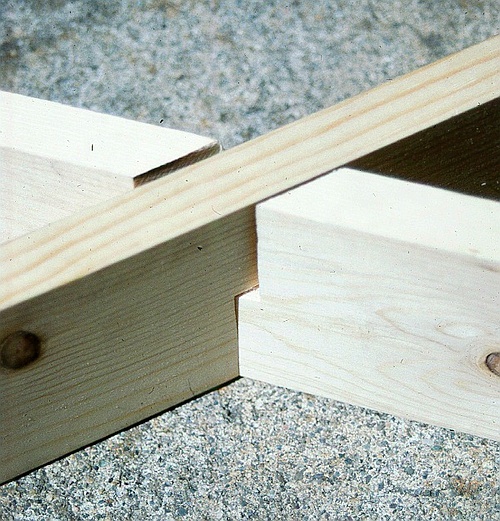
Below: Detail of the interlocking frame members.
Excuse the gaps - I'm not a woodworker!
Excuse the gaps - I'm not a woodworker!
Below: The Ramp section was constructed first using framing
members set perpendicular to the track. WIth just a 3/4" layer of
foam top, there were small dips in the track profile between the
frame members. I attempted to fix this by gluing in foam supports
beneath the track routes. In hindsight, this section was doomed
to suffer track profile issues from the very beginning.
Again, for emphasis: Don't build a Free-mo module this way!
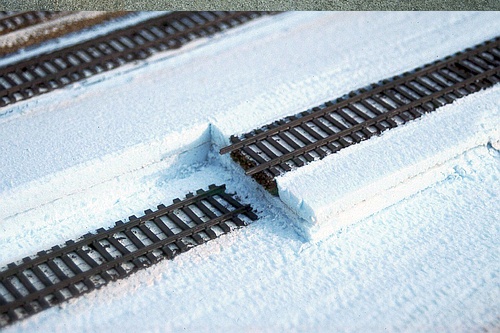
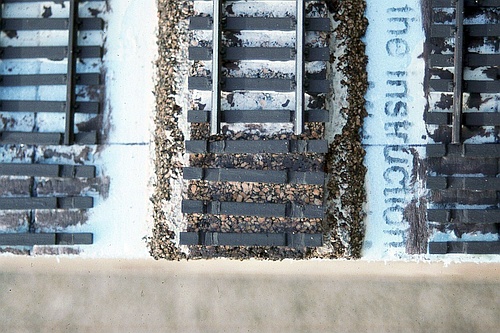
Below: The original track installation truncated the rails 1 inch from
the endplates, including the internal section joints. Loose ties were
installed with "trenches" carved in to clear joiners on "fitter" rails that
would bridge the joint, similar to how standard Free-mo ends work.
the endplates, including the internal section joints. Loose ties were
installed with "trenches" carved in to clear joiners on "fitter" rails that
would bridge the joint, similar to how standard Free-mo ends work.
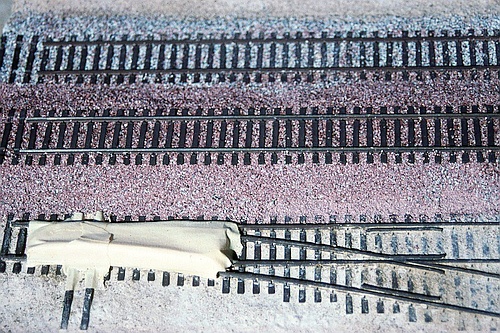
Below: The derail, made by modifying a Walthers #5 left-hand turnout.
The modules' back ends are secured to the guide rails using
1/4" bolts and easy-to-remove wingnuts, preventing the
modules from sliding forward/back during transport.
1/4" bolts and easy-to-remove wingnuts, preventing the
modules from sliding forward/back during transport.
The three curved sections slide in, guided by wooden 2x2 rails
fixed to the base of the rack (carpeted to prevent scratching the
fascias). Their front ends nestle into padded blocks mounted to
the rack's front wall, preventing the sections from tipping over.
The rectangular Ramp section rides separately, either in the
rear seat of an extra-cab pickup, or ahead of the transport rack
in a cargo van (the white brackets seen on this rack carry a
stand-alone 48" long module called Iona, not associated with
Glen Frazer, which usually comes along to setup events too).
-- About
-- Contact
-- Diesels
-- Links
entire website copyright Gregg Fuhriman
created with CoffeeCup Visual Site Designer
created with CoffeeCup Visual Site Designer
-- Layouts
-- Modules
-- Signalling